Keeping a home in top shape is not a one-time project, it is a year-round commitment that pays off when it comes time to sell or simply enjoy your space without costly surprises. Many homeowners focus on emergency repairs instead of prevention, which often leads to higher bills and lower resale value. This checklist breaks down what to inspect, repair, and upgrade each season so your property stays safe, efficient, and attractive. By the end, you will have a clear, practical roadmap for protecting your investment all year long.
Spring Tasks That Set the Tone for the Year
Spring is the season to assess winter damage and prepare your property for warmer months ahead. Start by walking the exterior of your home to check for cracked siding, loose gutters, or shifted foundation soil caused by freeze-thaw cycles. Look closely for gaps wider than a quarter-inch around window frames or doors, as these often signal settling that worsened over the cold months.
While you’re outside, take a few minutes to inspect the roofline for missing shingles, granule buildup in gutters, or soft spots that suggest trapped moisture. This is also an ideal time to schedule roofing installation or repair work, since contractors are often less booked before the summer rush and mild weather makes inspections easier.
Booking early in spring can also mean better pricing, as demand and material costs tend to climb once storm season hits. If your roof is nearing the 15-20 year mark, a professional evaluation now can help you plan for replacement before a leak forces the issue.
Beyond the structure itself, spring is when your yard needs the most attention to recover from winter dormancy. Freezing temperatures and heavy snow loads can leave shrubs misshapen, lawns patchy, and soil compacted, so a thorough walkthrough of your landscaping should be one of the first outdoor tasks on your list.
Start by trimming overgrown or storm-damaged branches, especially any limbs hanging near the roofline or siding, since these can scratch paint or trap moisture against exterior surfaces. Reseed bare or thinning patches in the lawn once soil temperatures reach around 55 degrees Fahrenheit, and consider aerating compacted areas to help water and nutrients reach the roots.
Grading and drainage deserve equal attention. Check that soil slopes away from your foundation at roughly a 6-inch drop over the first 10 feet, clear out any clogged downspout extensions, and fill in low spots where snowmelt or spring rain tends to collect. Addressing these issues now helps prevent water from pooling near your foundation later in the year, when heavier summer storms put even more pressure on your drainage system.
- Inspect the roof for missing or curling shingles, granule loss in gutters, and soft spots that may signal water damage
- Clean gutters and downspouts thoroughly, ensuring water flows at least 5 feet away from the foundation
- Check exterior paint and caulking for cracks, especially around windows, doors, and trim where moisture can seep in
- Test irrigation systems before heavy watering season, checking for clogged heads, leaks, and even coverage across zones
- Aerate and fertilize the lawn for healthy growth, timing applications to soil temperature and grass type for best results
Keeping Systems Running Smoothly Through Summer

Summer heat puts extra strain on electrical systems and appliances, making it a smart time to schedule a professional check-up. Calling in electrician services to inspect outlets, breaker panels, and outdoor wiring can catch small issues before they become fire hazards. This is especially important if your home has aging wiring—anything over 20 years old—or if you have added new appliances like a second air conditioning unit, hot tub, or EV charger that draw more power than the system was originally designed for.
Warning signs worth flagging to a professional include flickering lights, warm or discolored outlet covers, and breakers that trip repeatedly during peak cooling months. An inspection typically also checks that GFCI outlets near pools, patios, and outdoor kitchens are functioning correctly, since summer humidity and water exposure increase shock risk. Scheduling this service once a year, ideally before the hottest stretch hits, helps protect both your appliances and your home’s resale value.
Hot weather also means heavier demand on your hot water system, particularly with more laundry, showers, and outdoor cleaning. This extra strain can expose weaknesses that stayed hidden during cooler months when usage was lighter. If your unit is more than ten years old or showing signs of rust and inconsistent temperatures, it’s worth having it inspected before summer’s peak usage arrives.
Watch for other warning signs too, like a tank that makes rumbling or popping noises, water that takes longer to heat, or a slow leak pooling near the base. Sediment buildup is a common culprit in older tanks and can shorten a unit’s lifespan by several years if left unaddressed. Flushing the tank annually can help, but once corrosion sets in, repairs are usually just a temporary fix.
Planning water heater installation before your unit fails completely can save you from an unexpected cold shower or costly water damage to floors and walls. Scheduling the replacement during a slower season, rather than waiting for a mid-summer breakdown, also gives you more flexibility to compare models, sizes, and energy-efficient options that suit your household’s needs.
- Test smoke detectors and carbon monoxide alarms; replace batteries and swap out any units older than 10 years
- Inspect outdoor outlets and extension cords for wear, cracking, or exposed wire, and confirm GFCI outlets trip properly when tested
- Flush the water heater tank to remove sediment buildup, which improves efficiency and can extend the unit’s lifespan by several years
- Check attic insulation and ventilation for heat buildup, aiming for balanced intake and exhaust airflow to prevent trapped heat
- Service the air conditioning unit before peak usage: replace filters, clean the condenser coils, and check refrigerant levels
- Clear debris from outdoor condenser units to maintain proper airflow and reduce strain on the system
Preparing the Home Before Cooler Weather Arrives
Fall is your last real opportunity to prepare before winter tightens its grip, so it pays to be thorough. Walk the exterior of your home and check for drafts around doors and windows using a lit candle or your bare hand—if you feel air movement, apply weatherstripping or fresh caulk before temperatures drop. Have your chimney professionally swept to clear creosote buildup, which is a leading cause of house fires during winter months.
Your furnace also deserves attention: replace the air filter, test the thermostat, and consider a professional tune-up to catch worn belts or failing components before they leave you without heat on the coldest night of the year. It’s also worth checking that vents and returns throughout the house are unobstructed by furniture or rugs.
If your home relies on an oil-based heating system, now is the time to schedule a heating oil delivery and confirm your tank levels, ideally keeping them above 30% capacity. Demand and prices for heating oil typically climb once cold weather sets in, so locking in an early fall delivery can save you money and guarantee you’re not caught waiting during a supply crunch.
It is also worth double checking your emergency heating plan in case of a sudden cold snap or supply delay. This means confirming that propane or heating oil tanks are filled before the first hard freeze, since suppliers often see two-week backlogs once temperatures drop statewide. If you rely on a backup generator, test it under load and make sure you have enough fuel stored for at least 48 hours without power.
Homeowners who wait until the first freeze often find themselves scrambling, so scheduling deliveries and inspections early avoids unnecessary stress. Book your furnace or boiler inspection in September or early October, before HVAC technicians’ calendars fill up with emergency calls. It’s also worth keeping a small emergency kit on hand—extra blankets, a battery-powered space heater, and flashlights—in case a delivery or repair is delayed by a day or two.
- Clean and inspect the chimney and fireplace, checking for creosote buildup, cracks, or nesting debris before the first fire of the season
- Rake leaves and clear gutters again after leaf drop, since a second cleanup in late fall prevents clogged downspouts and ice dams later
- Check weatherstripping around doors and windows, replacing worn seals to cut drafts and lower heating costs by up to 10%
- Have your furnace professionally serviced, including filter replacement, burner inspection, and a carbon monoxide detector test
- Confirm fuel supply and delivery schedules early, whether propane, oil, or firewood, to avoid mid-winter shortages
- Test the thermostat and, if applicable, upgrade to a programmable or smart model to optimize seasonal energy use
- Inspect attic insulation levels to ensure adequate coverage, since gaps can lead to heat loss and higher utility bills
Protecting Your Home Against Winter Weather
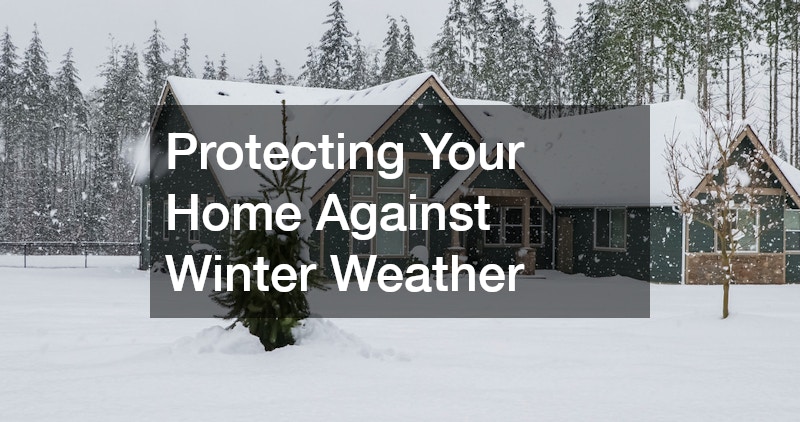
Winter is unforgiving on any weak points in your home’s exterior, especially around windows and doors where cold air can sneak in. Even a gap as small as 1/8 inch around a window frame can let in as much cold air as leaving a small hole in your wall, driving up heating costs and stressing your HVAC system. If you have noticed drafts, condensation between panes, visible frost on interior glass, or rising energy bills, these are all signs that your current windows and doors are no longer performing as they should.
Before winter fully sets in, walk the perimeter of your home and check for cracked caulking, worn weatherstripping, or doors that no longer sit flush in their frames. These small issues often signal bigger problems brewing underneath, like deteriorating seals or shifting foundations. Catching them early can save you from more expensive repairs once temperatures drop.
If problems persist beyond simple fixes, it may be time to bring in an impact windows and doors installer to evaluate your options. Upgraded units not only improve comfort but also add a layer of protection against storms, extreme temperature swings, and even break-ins, since impact-resistant glass is built to withstand significant force. Many homeowners also find that energy-efficient replacements pay for themselves over time through lower utility bills and increased home value.
Beyond comfort, energy efficient windows and doors can meaningfully reduce heating costs over time, which matters most during the coldest stretch of the year. The U.S. Department of Energy estimates that drafty windows and doors can account for up to 30% of a home’s heat loss, so even modest upgrades can translate into noticeably lower utility bills each winter.
Simple fixes like weatherstripping, door sweeps, and caulking around window frames often cost less than $50 in materials but can seal out drafts almost immediately. For older windows showing condensation between panes or visible gaps, replacement with double-paned, low-E glass units is worth the investment, since they typically pay for themselves in energy savings within five to ten years.
Taking care of this before winter fully sets in gives installers time to work without weather delays and ensures your home is sealed tight when you need it most. Scheduling inspections or replacements in early fall also avoids the backlog contractors typically face once temperatures drop and demand spikes.
- Check for drafts around window and door frames, especially at corners and where trim meets siding
- Inspect weather seals and caulking, replacing any that feel brittle or cracked
- Monitor energy bills for unusual spikes, which often signal hidden air leaks or failing insulation
- Clear snow and ice from walkways and steps promptly, using sand or pet-safe de-icer to prevent slips
- Insulate pipes in unheated areas like garages, crawl spaces, and basements to prevent freezing and costly bursts
- Disconnect and drain outdoor hoses, then shut off exterior spigots before the first hard freeze
- Have your furnace or heating system professionally serviced, including a filter change, before peak winter use
Annual Roof and Exterior Health Checks
Your roof and exterior surfaces take the brunt of weather damage all year, so a dedicated annual inspection is worth the time investment. Bringing in experienced roofers once a year, ideally after a harsh season, helps identify small issues like curling shingles or flashing damage before they turn into leaks. Catching problems early is almost always less expensive than dealing with interior water damage later.
While you are at it, take a broader look at siding, trim, and exterior fixtures for signs of wear or pest activity. A thorough exterior check gives you a clear picture of what needs attention before the next seasonal cycle begins.
- Look for sagging areas or pooling water on flat roofs
- Check flashing around chimneys and vents
- Examine gutters for rust or separation from the house
- Inspect siding for cracks, warping, or discoloration
- Look for signs of pests near rooflines and eaves
Refreshing Interior Spaces Without Overspending

Interior updates do not need to be overwhelming, but a periodic refresh keeps your home functional and appealing. If your kitchen feels dated or storage is limited, installing new kitchen cabinets can dramatically change the look and usability of the space without requiring a full remodel. Small updates like this often deliver a strong return when it comes time to sell.
For larger projects, working with licensed remodeling contractors ensures the work meets code and holds up over time. Whether you are updating a bathroom, finishing a basement, or reconfiguring a floor plan, professional guidance helps avoid costly mistakes and keeps the project on schedule.
- Prioritize updates that improve daily function first
- Get multiple quotes before committing to a major project
- Ask about warranties on materials and labor
- Plan renovations around your long-term living needs
- Keep a folder of permits and project documentation
Knowing When to Consider Building or Expanding
Sometimes maintenance and remodeling are not enough, especially if your family has outgrown the space or the layout no longer fits your lifestyle. In these cases, it can be worth speaking with new home builders about the cost and timeline of constructing an addition or even a completely new property. They can help you understand zoning requirements, material costs, and realistic timelines before you commit.
This decision often comes down to comparing the cost of major renovations against building fresh, especially if your current home has significant structural limitations. Getting professional input early prevents you from investing heavily in a property that may never fully meet your needs.
- Compare renovation costs against new construction estimates
- Ask about energy efficiency standards in new builds
- Review builder portfolios and past client feedback
- Understand financing options for new construction
- Factor in future resale value when choosing a design
Building a Realistic Maintenance Budget

One of the biggest reasons homeowners fall behind on upkeep is failing to plan financially for it. Setting aside a small percentage of your home’s value each year, often recommended between one and three percent, helps ensure funds are available when repairs come up. This approach turns maintenance from a stressful surprise into a predictable, manageable expense.
It also helps to separate short-term fixes from long-term investments when budgeting, since the timing and cost structure of each differ significantly. Planning ahead gives you more flexibility to shop around and choose quality work rather than rushing into the first available option.
- Set aside a dedicated home maintenance savings fund
- Separate emergency repairs from planned upgrades
- Track seasonal costs to spot spending patterns
- Prioritize safety related repairs over cosmetic ones
- Reassess your budget annually as needs change
Keeping Records to Track Your Home’s Progress
Documentation might not feel exciting, but it is one of the most valuable habits a homeowner can build. Keeping receipts, warranties, and photos of completed work creates a clear history that proves helpful during resale or insurance claims. It also helps you spot patterns, such as recurring issues in the same area of the home that may point to a bigger underlying problem.
A simple spreadsheet or dedicated folder, digital or physical, is enough to stay organized. Over time, this record becomes a valuable tool for future buyers, appraisers, or contractors who need to understand the home’s maintenance history.
- Save receipts and invoices for all completed work
- Photograph before and after conditions for major repairs
- Note the date and provider for each service performed
- Store warranty documents in one accessible location
- Update your records at least twice a year
Staying on top of home maintenance does not require perfection, just consistency and a willingness to address small issues before they grow. Use this checklist as a living guide, adjusting it based on your home’s age, climate, and specific needs. The sooner you build these habits into your routine, the more value and peace of mind you will get from your property for years to come.