A small gap between your siding and trim might look like nothing more than a cosmetic flaw, but it can quietly become one of the most expensive problems your home develops. Water finds every opening, and once it slips behind the siding, it can rot framing, ruin insulation, and invite mold long before you notice a stain on the wall. The good news is that these gaps are easy to spot and address if you know what to look for. This guide walks you through where gaps tend to form, why they matter, and how to catch trouble before it spreads.
Identify the Warning Signs of Siding Gaps
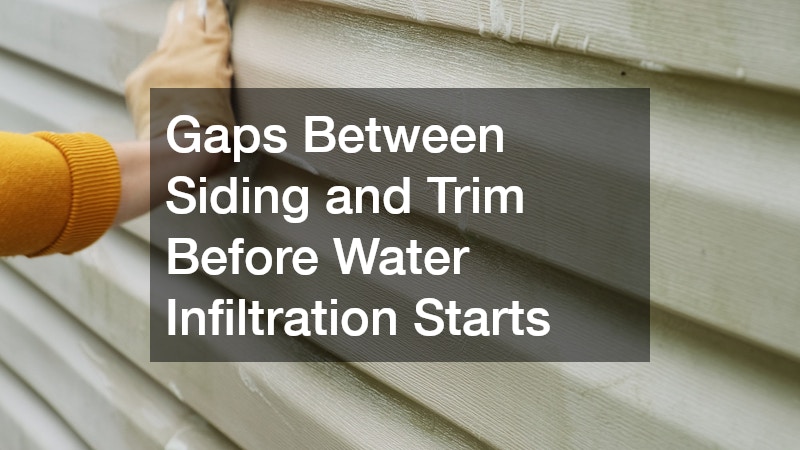
The first step in protecting your home is knowing what a problem gap actually looks like. Gaps often appear where siding meets window frames, door casings, corner boards, or the roofline, and they can be as thin as a pencil line yet still let water through. Over time, sunlight and temperature swings cause caulk to shrink and pull away from these joints, creating openings that widen year after year.
Homeowners should walk the perimeter of their house at least twice a year to check for these signs. A flashlight and a slow, methodical inspection can reveal issues that are easy to miss from a distance.
- Cracked or missing caulk along trim edges
- Discoloration or streaking below joints
- Soft or bubbling siding near corners
- Visible daylight through small gaps
- Peeling paint clustered around trim boards
Understand How Water Travels Behind the Wall
Water does not simply run down the surface of siding and disappear. Once it enters a gap, gravity pulls it downward behind the siding, where it can travel several feet before pooling against sheathing or framing. This hidden path is why a small gap near a second-story window can eventually cause water stains near the foundation.
Because this movement is invisible from the outside, many homeowners underestimate how far damage can spread. A leak that starts at the roofline can saturate insulation, weaken drywall, and create the kind of hidden moisture that mold thrives on. Understanding this flow pattern helps explain why even minor gaps deserve prompt attention.
Recognize the Role of Roofline and Flashing Failures

Many siding and trim gaps trace back to problems at the roofline rather than the siding itself. When flashing is improperly installed, undersized, or has simply deteriorated after years of sun and temperature swings, water can be redirected behind the trim instead of away from the house. Drip edge flashing, step flashing at wall intersections, and kick-out flashing where a roofline meets a sidewall are especially common failure points, since even a half-inch gap in coverage can funnel a surprising amount of water directly into the wall assembly. This same principle applies to roof tile systems, where cracked, shifted, or missing tile can channel water toward the wall line instead of off the roof edge. A single displaced tile near a valley or wall junction can redirect gallons of runoff during a heavy storm, sending it straight into a trim joint that was never designed to handle that volume. Over time, this misdirected flow can saturate the sheathing behind the siding long before any staining becomes visible from the ground. This is one of the more overlooked contributors to hidden moisture damage, since homeowners often focus on the siding without checking what is happening above it. A useful habit is to inspect flashing and tile condition at least once a year, ideally after winter weather, and immediately following any major storm with high winds or hail.
If you notice recurring gaps near the roof edge despite recaulking, it may be worth having a residential roofer inspect the flashing and roof-to-wall transitions. Recaulking treats the symptom, not the source, so if the gap reopens within a season or two, something upstream is likely pushing moisture into that joint. A residential roofer will typically check step flashing along roof-to-wall intersections, counter-flashing at chimneys or dormers, and the drip edge above trim boards for rust, gaps, or improper overlap. They can also run water tests, essentially simulating rainfall with a hose, to trace exactly where moisture enters and how far it travels before showing up as a gap or stain near your siding. This diagnostic step matters because water can travel several feet horizontally along sheathing before it becomes visible, making the true entry point far from where the damage appears. This is a different repair than a simple caulking job. Flashing issues often require removing a section of siding or trim, replacing corroded metal, and re-sealing with proper underlayment, work that costs more upfront but addresses the actual failure point. Catching this early can prevent much larger structural repairs later, including rotted sheathing, damaged framing, or mold growth behind the wall assembly, all of which run into thousands of dollars if left unaddressed for multiple seasons.
Inspect Window and Door Trim for Hidden Leaks
Windows and doors are among the most common places for siding gaps to form because they involve multiple materials meeting at once. Wood, vinyl, metal, and caulk all expand and contract at different rates, which gradually loosens seals around frames. Once that seal fails, rain can travel directly into the wall cavity surrounding the window.
If you are noticing recurring moisture issues around a particular window, it may be a sign that the unit itself is aging or was not flashed correctly during installation. In some cases, working with window companies to reseal or replace an older unit solves a leak problem that caulking alone cannot fix. Addressing the root cause here prevents the same gap from reappearing every season.
Evaluate Gutter Placement and Overflow Patterns

Gutters play a bigger role in siding gaps than most homeowners realize. When gutters overflow or are pitched incorrectly, water can splash directly onto siding and trim joints instead of flowing safely into the downspout. Over time, this repeated exposure accelerates caulk breakdown and wood rot around nearby trim.
Clogged or undersized gutters are a frequent culprit, especially near rooflines with heavy tree coverage. Reputable gutter businesses can assess whether your current system is properly sized and sloped for your roof, and they can recommend guards or extensions to reduce splash-back. Solving a gutter issue is often far cheaper than repairing water damage caused by ignoring it.
Assess Nearby Landscaping and Drainage Patterns
The ground and greenery surrounding your home influence how much moisture ends up near your siding. Overgrown shrubs or low tree branches can trap humidity against exterior walls, while root systems can shift soil grading and redirect runoff toward the foundation. This creates a damp microclimate that speeds up caulk failure and wood decay near ground-level trim.
Keeping vegetation trimmed back and ensuring proper drainage away from the house are simple but effective preventive steps. Scheduling regular tree services to manage overhanging limbs can reduce moisture buildup and prevent debris from clogging gutters in the first place. Small adjustments outside the house often protect the siding just as much as repairs made directly to it.
Check Foundation and Ground-Level Trim Separately
Gaps near the bottom of the house deserve their own inspection routine because they are exposed to different risks than gaps higher up. Ground-level trim sits closer to sprinklers, splashing rain, and soil moisture, all of which accelerate deterioration. It is also an area where settling foundations can create separation between siding and trim that would not otherwise occur.
- Check for gaps where siding meets the foundation line
- Look for efflorescence or white mineral deposits nearby
- Confirm splash blocks direct water away from the house
- Watch for soft or spongy trim near ground level
If you notice water intrusion near a hose bib or exterior spigot, it is worth confirming that the fixture itself is not the source. Occasionally, plumbers discover that a slow leak from an outdoor spigot or supply line is mimicking what looks like a siding gap issue. Ruling out plumbing problems ensures you are treating the actual cause rather than just the symptom.
Address Small Gaps Before They Require Major Repairs

Once you have identified problem areas, timing matters. Gaps caught early can often be resealed with quality exterior caulk and fresh paint, while neglected gaps may require replacing rotted trim or sections of siding. Acting during dry, mild weather gives sealants the best chance to cure properly and last for years.
If your siding has multiple areas of chipped paint alongside these gaps, it may indicate the protective coating has worn thin across the whole exterior. In that case, hiring exterior painting companies to refresh the surface can extend the life of your repairs and make future gaps easier to spot. A well-maintained paint layer acts as an early warning system, since new cracking shows up faster on fresh paint than on old, faded coatings.
Plan Larger Exterior Upgrades With Water Protection in Mind
Sometimes recurring gaps are a sign that it’s time to think beyond spot repairs. If caulk keeps failing in the same spots year after year, or if you’re patching three or four locations every summer, the underlying materials may simply be worn out or the original installation may have been flawed from the start. If your siding is original to an older home, replacing sections during a broader home remodeling project can address gaps permanently while improving insulation and curb appeal. A full or partial re-siding job also gives you the chance to upgrade to modern materials like fiber cement or engineered wood, which hold paint and caulk longer and resist warping better than older wood siding. This is also a good opportunity to correct flashing details that may have been installed incorrectly decades ago, since older homes often used minimal or improperly lapped flashing around windows and doors that never met current standards. While the walls are open, it’s worth asking your contractor about installing a weather-resistant barrier or house wrap if one isn’t already present, as this adds a second line of defense against moisture even if future gaps develop. Budget-wise, homeowners should expect siding replacement tied to a larger remodel to cost more upfront than piecemeal repairs, but the long-term savings on water damage, mold remediation, and energy loss typically justify the investment.
While you are planning exterior work, it makes sense to think about how other systems around the house interact with moisture control. Siding and trim gaps rarely exist in isolation—poor drainage at ground level often makes water infiltration worse by keeping soil and splash-back moisture in constant contact with the lower courses of siding. Looking at the bigger picture during planning can prevent you from fixing one problem while leaving another one actively feeding it. For example, homeowners sometimes bundle driveway and walkway work like asphalt paving with exterior projects to improve overall drainage away from the foundation. A driveway that slopes toward the house, even by an inch or two over its length, can direct runoff straight at the siding during heavy rain, so regrading or repaving with proper slope is worth evaluating at the same time as trim repairs. Others use the same season to regrade landscaping beds, add gravel or French drains along problem areas, and extend downspout extensions farther from the siding—often five feet or more—to keep concentrated roof runoff away from vulnerable joints. Mulch beds piled too high against the foundation are another common culprit, since they hold moisture against the base of the wall and accelerate rot in trim boards. Coordinating these projects can save money and reduce the number of times contractors need to access the same areas of your home. It also gives you a chance to address drainage, grading, and siding gaps as one connected system rather than a series of unrelated repairs, which tends to hold up better over the long run.
Protect Indoor Comfort Systems From Related Moisture Issues

Water infiltration around siding does not always stay contained to walls and trim. In some homes, moisture that seeps behind exterior walls can reach areas near outdoor condenser units or ductwork routed close to the exterior wall. If you notice unexplained humidity or musty odors indoors, it is worth having the issue evaluated alongside your exterior inspection.
Occasionally, homeowners call AC repair services expecting a mechanical problem, only to discover that excess condensation or humidity is linked to an exterior leak rather than the system itself. Ruling this out early prevents wasted repair costs and directs attention back to the actual entry point. Treating the home as a connected system, rather than isolated parts, leads to more accurate diagnoses overall.
Gaps between siding and trim rarely stay small if they are ignored, but they are also one of the easiest problems to manage when caught early. Regular inspections, prompt sealing, and attention to related systems like gutters, flashing, and landscaping can prevent minor cracks from becoming costly structural repairs. Take an afternoon this season to walk your home’s exterior and address any gaps you find before the next heavy rain arrives. Your home will stay drier, healthier, and better protected for years to come.