Key Takeaways
- Wood siding needs attention in every season, with each quarter of the year presenting unique threats like moisture, UV damage, pests, or freeze-thaw cycles
- A thorough visual inspection twice a year catches small issues like cracked caulk, peeling paint, or soft spots before they turn into structural problems
- Keeping vegetation trimmed back from exterior walls prevents trapped moisture, which is one of the leading causes of rot and mildew on wood exteriors
- Cleaning your siding with a gentle solution and soft brush each year removes mildew, pollen, and grime without damaging the finish
- Repainting or restaining on the correct schedule — based on the product and wood type — extends the life of the siding dramatically
- Fall preparation, including sealing cracks and clearing gutters, protects wood from winter moisture infiltration
- Addressing hardware, flashing, and caulking as part of your yearly routine stops water from sneaking behind the boards
Why Wood Siding Deserves a Seasonal Strategy
Wood siding is beautiful, warm, and full of character — but it is also a living material. It expands when the air is humid, contracts when the weather turns dry, and reacts to every drop of rain, gust of wind, and hour of sunlight it absorbs. Unlike vinyl or fiber cement, wood will not quietly sit on the side of your house for decades without attention. It asks for a relationship.
The good news is that the work involved is not complicated. It just has to happen on a schedule that matches what nature is throwing at your walls. Spring demands one kind of care. Summer demands another. Fall and winter each come with their own list. When you break the year into seasonal chunks, the whole thing becomes manageable, even enjoyable.
This guide walks you through that year-round rhythm step by step. You will learn what to inspect, what to clean, what to seal, and when to schedule larger projects like repainting. By the end, you will have a practical framework you can use every year to keep your siding looking sharp and performing well.
Getting to Know Your Siding Before You Start
Before you grab a brush or a ladder, spend a little time understanding what you actually have on your walls. Cedar, redwood, pine, cypress, and engineered wood products all behave differently. Rough-sawn boards hold stain longer than smooth ones. Painted siding and stained siding need different care. Knowing what you are working with changes everything about your maintenance plan.
Take a slow walk around the house with a notebook. Note the species if you know it, the current finish (paint, solid stain, or semitransparent stain), the general condition of each wall, and any spots that already look rough. South- and west-facing walls take the most sun damage, while north-facing walls tend to grow more mildew because they stay damp longer. This single afternoon of observation will shape every decision you make going forward.
Understanding Finish Life Expectancy
Finish type is one of the biggest factors in how often you will have to redo your walls. According to the USDA Forest Products Laboratory, semitransparent stain holds up for roughly four to eight years on rough-sawn cedar and only two to four years on smooth cedar. That is a huge range, and it tells you something important: the texture of your wood matters almost as much as the product you put on it. Paint lasts longer than stain in most climates, but it also hides the grain and can peel in dramatic sheets if moisture gets behind it.
Once you know roughly when your current finish was applied, and what it is, you can start predicting when the next refresh is coming. Mark it on your calendar, even if it is five years out. Future you will be grateful.
Spring: The Big Wake-Up Inspection

Spring is when you survey the damage from winter and set the tone for the rest of the year. Pick a dry, mild day and start on the ground floor. Work your way around the house methodically, looking at every wall from a few feet away, then up close. Bring a screwdriver so you can gently probe any suspicious spots for softness.
Watch for peeling paint, lifted stain, cracked caulk around windows and doors, dark streaks running down from gutters, green or black patches of mildew, split boards, and nail heads that have worked their way loose. Woodpeckers, carpenter bees, and squirrels all leave distinctive marks, so note any holes as well. This is the single most important step in learning how to maintain wood siding, because every repair gets easier and cheaper the sooner you catch it.
Here is a quick list to run through during your spring walkaround:
- Loose, cracked, or missing caulk at joints, seams, and trim
- Soft or spongy areas near the base of walls and around windows
- Dark staining below gutters, downspouts, or roof valleys
- Mildew or algae growth on shaded elevations
- Nail or screw heads that have popped out
- Gaps between siding and flashing around doors, windows, and chimneys
Make a punch list from everything you find. Prioritize anything involving moisture or structural concern first, then move down to cosmetic fixes.
Summer: Cleaning, Repairing, and Refinishing Season
Summer is when the real work gets done. The wood is dry, the days are long, and finishes cure properly. This is the season for washing, patching, sanding, and recoating.
Start with a gentle wash. Mix a mild detergent with warm water, or use a dedicated siding cleaner designed for wood. Work in sections from the bottom up to avoid streaking, then rinse from the top down. A soft-bristled brush on a pole handles most dirt and mildew without tearing up the finish. Skip the high-pressure washer — it drives water behind boards and can gouge soft wood in seconds.
Once the walls are clean and dry, tackle your spring punch list. Replace damaged boards, drive popped nails back in or replace them with ring-shank nails, recaulk failed joints with a high-quality exterior sealant, and spot-prime any bare wood you expose while sanding.
When to Commit to a Full Refinish
If large sections are peeling or the color looks chalky and faded, it is time for a full recoat. According to Southwest Exteriors, wood siding generally needs repainting or restaining every three to five years, though your product and climate can shift that window. If you are using a quality exterior acrylic latex paint, repainting is typically needed every five to eight years under normal conditions. Stain-based finishes come due sooner but are easier to refresh because they do not peel the same way paint does.
Plan a full refinish for a stretch of mild, dry weather. Temperatures between 50 and 85 degrees Fahrenheit with low humidity give you the best results. Never paint in direct sunlight on a hot wall — the finish can flash-dry and fail early.
Fall: Battening Down for Winter
Fall is about prevention. Everything you seal, clear, and tighten now saves you from damage once the cold sets in. Water that sneaks behind siding in October becomes ice in January, and ice expands with enough force to split boards and pop fasteners.
Walk the house again with fresh eyes. The summer sun may have opened new cracks in caulk or dried out sealant you thought was fine in spring. Pay special attention to the undersides of window sills, the tops of door casings, and the horizontal seams where water likes to pool. This is also the time to clean gutters and extend downspouts so winter runoff does not pour down your walls.
Use this fall checklist as a guide:
- Reseal any caulk lines that have cracked, shrunk, or pulled away from the wood
- Clear gutters completely and flush downspouts to confirm they drain away from the foundation
- Trim back shrubs, vines, and tree limbs so nothing touches the siding during winter storms
- Check flashing above windows, doors, and where roof edges meet walls
- Touch up any bare wood with primer and a matching topcoat before temperatures drop
- Inspect the bottom course of siding for ground contact or splashback damage
- Store or cover anything leaning against the walls, like firewood or garden tools
If you only have one weekend for exterior work in the fall, spend it on caulk and gutters. Those two tasks alone block the vast majority of winter moisture problems, and they are the kind of small jobs that prevent costly repairs down the road when a neglected seam turns into a rotted wall cavity.
Dealing with Pests Before the First Freeze
Fall is also prime time for insects and rodents looking for a warm place to overwinter. Carpenter ants and bees often leave sawdust piles at the base of walls — a dead giveaway that they have been tunneling. Mice can squeeze through gaps the width of a pencil, and once they are behind your siding, they bring chewing, nesting, and urine damage with them.
Seal entry points with a combination of caulk, copper mesh, and exterior-grade foam where appropriate. If you see active infestation, treat it before you close everything up for the year. A sealed wall with pests trapped inside is worse than an open one.
Winter: Watching, Not Working
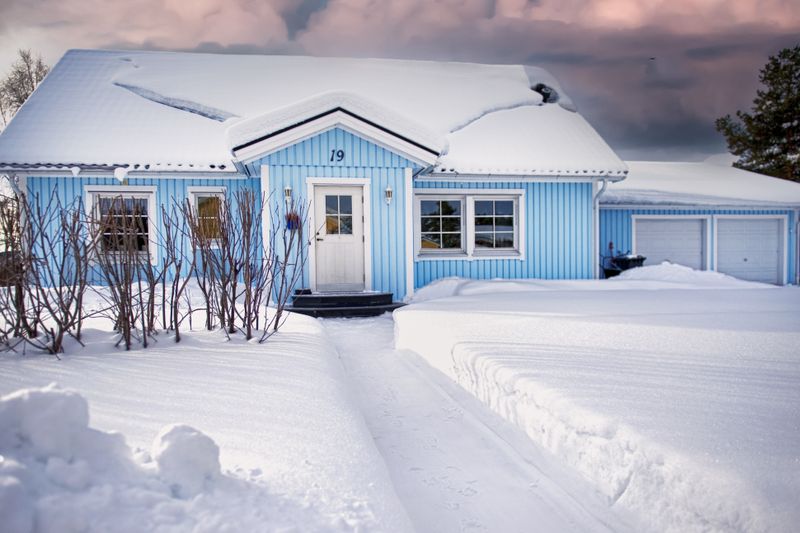
Winter is the quiet season for wood siding, but it is not a season to ignore. You will not be sanding or repainting in freezing weather, but you should still be paying attention. After every major storm, walk the perimeter and look for new damage — a branch that tore off a piece of trim, ice damming that forced water down a wall, or snow piled against the siding where it does not belong.
Keep snow shoveled away from the base of exterior walls. Prolonged contact with wet snow is one of the fastest ways to rot out the bottom courses. If you see icicles forming along a specific stretch of roof edge, note it for spring — that often indicates attic insulation or ventilation issues that are also stressing your siding below.
Monitoring Interior Signs of Exterior Problems
Winter is actually when some siding problems reveal themselves from the inside. Watch for staining on interior walls near the ceiling, a musty smell in closets along exterior walls, or paint that starts to bubble indoors. All of these can trace back to water getting past the siding somewhere outside. Staying ahead of these clues is part of good home maintenance, and catching them in January gives you a full head start on spring repairs.
Building a Year-Round Rhythm You Can Actually Follow
The seasonal approach only works if it becomes a habit, and habits stick when they are tied to things you already do. Pair your spring inspection with the weekend you swap out storm windows or pull patio furniture out of storage. Line up fall caulking with the day you clean the gutters. Attach the big refinish projects to a specific summer month and block the calendar a year in advance.
A Simple Annual Calendar
Here is a condensed version of the whole year at a glance, which you can adapt to your climate:
- March or April: Full visual inspection, create punch list, order any materials you will need
- May: Gentle wash, minor repairs, spot priming
- June through August: Sanding, caulking, and refinishing projects
- September: Second inspection, pest check, trim vegetation back
- October: Caulk refresh, gutter cleaning, flashing check
- November through February: Storm monitoring, snow management, interior checks
Not every year will require the same level of work. In off years, you might only need the inspections, a wash, and some touch-up caulking. In refinish years, plan for a longer summer commitment or budget for a professional crew.
Knowing When to Call a Professional
There is no shame in bringing in help for the bigger jobs. Two-story homes, steep lot grades, and extensive rot repairs all push a project past the comfort zone of most homeowners. A pro can usually complete a full exterior refinish in a fraction of the time it would take you, and they bring equipment like scaffolding and sprayers that produce a more uniform finish.
Reserve your DIY energy for the inspections, cleaning, and small repairs that happen every year. Save the paid help for the multi-year projects where quality and speed really pay off.
Conclusion
Wood siding rewards the homeowners who pay attention to it. It is not a material you can install and forget, but it is also not as demanding as its reputation suggests — most of what it needs is observation, a little cleaning, and the occasional round of caulk and paint applied at the right time of year. The seasonal rhythm turns a potentially overwhelming responsibility into a handful of short projects spaced across twelve months.
The homeowners who get the longest life out of their wood exteriors are the ones who treat small issues as small issues, before weather, pests, or time turn them into something bigger. A loose nail driven back in during a spring walkaround is a two-minute fix. The same nail ignored for three winters becomes a water intrusion point, then a rot pocket, then a board replacement, then possibly a sheathing repair.
Start with one season. If it is spring where you are, begin with the inspection. If it is fall, start with gutters and caulk. Build from there, one quarter at a time, and in a year you will have a complete routine that keeps your siding looking beautiful and working the way it was designed to for decades to come.